Urban Beehive Placement: A Site Selection Guide
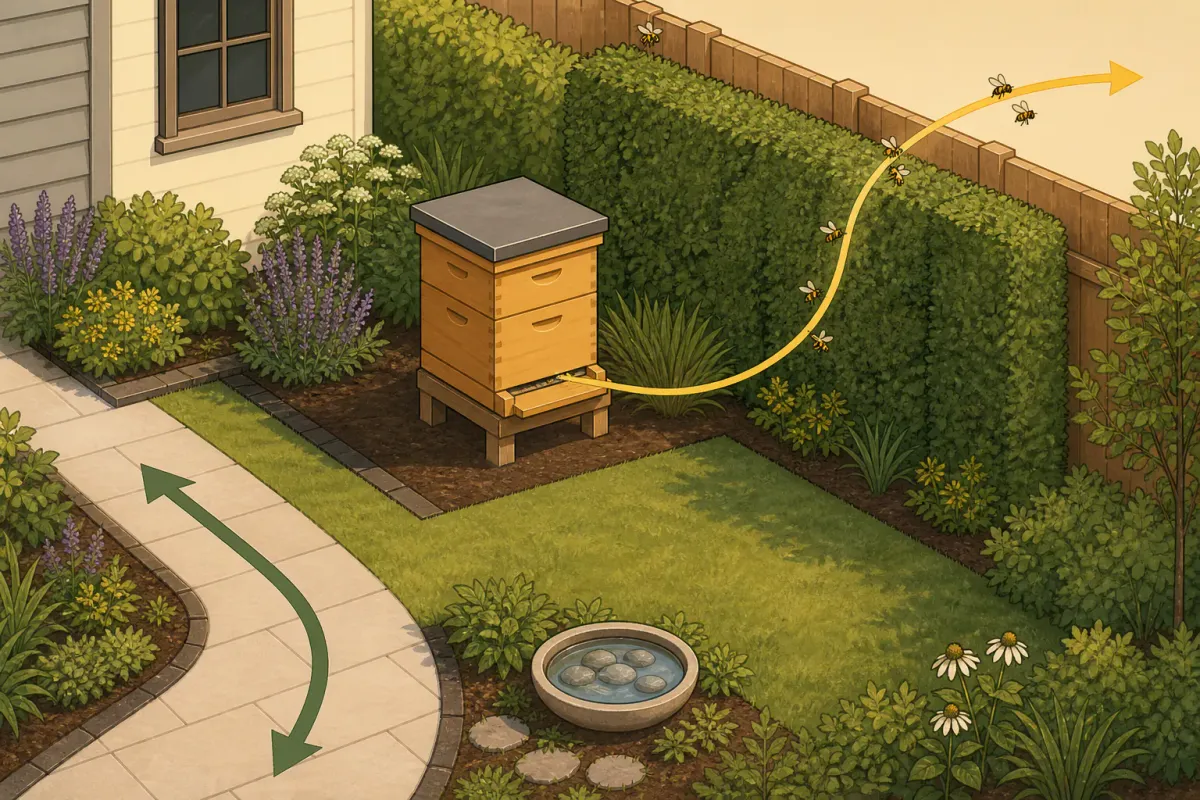
The best urban hive location is legal, stable, serviceable in every season, and out of routine human traffic. It gives bees a clear route away from people, provides dependable water, and leaves enough room for inspections, swarm response, and emergency removal.
Do not choose a spot from entrance direction or sunlight alone. Urban placement is a layered decision involving public rules, private permission, the physical site, and the people who share it. This framework synthesizes site-selection factors discussed by UC Agriculture and Natural Resources and nuisance-reduction practices from Oregon State University Extension. Local law and site conditions still control.
Urban hive placement scorecard
| Factor | Good evidence | Warning sign | Stop condition |
|---|---|---|---|
| Law and permission | Written approvals and current official rules match the exact address | An official answer is unclear or property documents are silent | Hives are prohibited, required approval is denied, or registration cannot be completed |
| Ground or structure | Stable, level, drained base with safe load capacity | Ponding, erosion, roof-membrane concerns, or uncertain balcony capacity | Visible structural damage or no qualified review where one is needed |
| Work access | Clear standing area and route for full boxes in all seasons | Tight turns, stairs, mud, ice, or shared corridors complicate work | Hive blocks an exit or requires unsafe climbing, reaching, or lifting |
| Flight path | Entrance sends bees toward open space or a safe upward route | Windows, doors, seating, paths, or property lines are close | Routine traffic must pass directly in front of the entrance |
| Water | Stable, maintainable source can be established before bees arrive | Source may dry out, spill, freeze, or create mosquitoes | The only likely water is a neighbor’s pool, pet bowl, or shared fixture |
| Weather | Morning sun, seasonal shade, drainage, and wind protection fit the climate | Reflected heat, deep shade, wind tunnel, flood pocket, or snow drift | Equipment cannot be secured or safely accessed in expected weather |
| Neighbors | Concerns and contacts are discussed; the hive remains unobtrusive | Nearby allergy concerns, play areas, pets, pools, or outdoor work need mitigation | No feasible way to prevent repeated interference with shared space |
| Security and response | Hive is protected from tampering and can be relocated | Public visibility or vandalism risk is high | Emergency services or building maintenance cannot work safely around it |
A strong score in one row cannot compensate for a stop condition in another.
1. Verify the exact address first
A postal ZIP code does not establish the governing jurisdiction or zoning. Start with the full street address and parcel, then identify state, county, incorporated city, zoning district, and any site-specific overlay.
Check:
- state apiary registration and inspection rules;
- city or county zoning and animal or nuisance code;
- colony limits, setbacks, barriers, and water requirements;
- lease, landlord, HOA, condo, deed, garden, or institutional rules;
- building, roof-access, and fire-safety requirements; and
- insurance conditions.
Use our beekeeping laws by ZIP code workflow to identify those layers. Treat an online article as a starting point, then verify with the responsible authority. The Portland beekeeping law page shows why that verification matters: the current city code and city web guide describe different 10-foot flyway alternatives. General placement advice cannot resolve a local source conflict.
2. Reserve the working area, not just the hive footprint
A closed hive occupies little ground. An inspection needs much more:
- room to stand beside or behind the hive;
- a stable place for the cover and removed boxes;
- a clear route for carrying equipment;
- space for a second beekeeper or mentor;
- a retreat path that does not cross the entrance; and
- access for swarm control or colony removal.
Mark the intended area at full working size. Open gates, doors, bins, and parked vehicles to see whether they conflict. Think about wet soil, snow, leaf buildup, darkness, and the heaviest honey box, not just a pleasant spring afternoon.
Keep the hive away from emergency exits, utility equipment, drains, and maintenance routes. On a roof or balcony, structural capacity and waterproofing require building-specific review; use the rooftop setup guide or the balcony suitability guide for those special cases.
3. Put the entrance outside routine traffic
Bees need a predictable route from the entrance to open air. Avoid aiming the entrance at:
- a gate, sidewalk, driveway, deck, play area, or clothesline;
- a neighbor’s door, window, seating, pool, or pet area;
- a school, restaurant patio, transit stop, or shared garden path; or
- reflective glass or a narrow corridor that redirects traffic unpredictably.
Observe the site at morning and evening, on workdays and weekends. A quiet corner during one visit may be a busy route at another time.
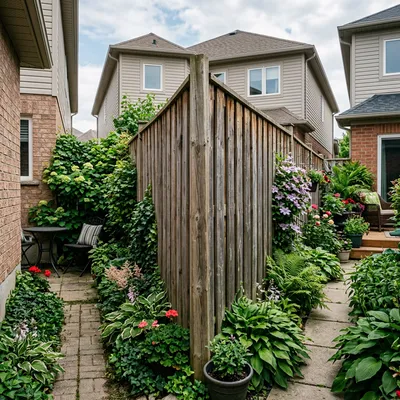
A fence, dense hedge, or purpose-built screen can encourage bees to rise above head level. It must be legal, stable, and placed without blocking access or ventilation. Do not copy a barrier height from another city; local codes differ. See how to plan a flyway barrier after confirming the official requirement.
4. Establish water before installing bees
Honey bees use water for cooling and feeding. If they establish a reliable route to a neighbor’s pool, fountain, condensate drain, or pet bowl, persuading them to switch can be difficult.
Place a stable water source near enough to be useful but outside the hive’s working zone. Provide safe landing surfaces, keep the container clean and filled, prevent mosquito breeding, and plan for evaporation or freezing. Position it where overflow will not damage a building or create a slip hazard.
Ask who will maintain it during travel, illness, heat waves, and water restrictions. A placement plan is incomplete without a backup caretaker. Use the safe bee-water station guide to choose landing surfaces, cleaning intervals, and seasonal checks.
5. Balance sun, shade, wind, and drainage
There is no universal compass direction that works in every climate and yard. Morning sun can encourage early activity and help dry moisture, while afternoon shade can reduce heat load in hot locations. Deep shade may keep equipment damp; reflected sun from masonry or glass can overheat a hive.
Choose a site with:
- firm, level support and drainage away from the stand;
- enough airflow to limit persistent dampness without creating a wind tunnel;
- seasonal shade appropriate to local summers;
- protection from prevailing storms and roof-edge turbulence; and
- safe winter access without a recurring snow or ice hazard.
Slight entrance tilt or ventilation practices depend on the equipment system and local instruction. The stand itself should remain stable as soil freezes, settles, or becomes saturated. Do not place a hive in a low spot that floods.
For an exposed roof, plan for heat with the rooftop heat-wave guide and for severe wind with the wind-damage prevention guide.
6. Evaluate neighbors and shared uses
Good placement reduces contact before a complaint occurs. Map neighboring doors, windows, play spaces, gardens, pools, pets, and work areas. Consider people above and below a roof or balcony, not just adjacent lots.
Tell directly affected people how to contact the beekeeper and what the response plan covers. Avoid absolute promises about stings or swarms. Explain instead how water, flight direction, inspections, gentle stock, and prompt relocation reduce risk.
If someone reports repeated bee traffic, verify whether honey bees from the hive are involved and address the attractant or route. The neighbor complaint guide provides a step-by-step communication process.
7. Consider forage without crowding pollinators
A city can offer diverse flowering plants, but nearby blooms do not guarantee year-round nutrition. Map major forage and likely dearth periods with local beekeepers. Avoid sites where pesticide applications are frequent or where the only flight route crosses a heavily treated landscape.
Adding honey bee colonies is not automatically a benefit to every urban ecosystem. Dense apiaries may increase competition with native pollinators where forage is limited. Choose a conservative colony count, plant season-long forage, and avoid pesticides that harm pollinators. Our pollinator garden guide is a useful companion even if the site ultimately does not host a hive.
8. Secure the apiary without trapping the beekeeper
Publicly visible colonies can be vandalized, opened, or approached by children and pets. Use fencing, gates, signs, or discreet placement appropriate to the property and local rules. Security measures must not block emergency access or create a hidden trip hazard.
On exposed sites, secure covers and empty equipment using methods approved for the structure. Do not attach anchors to a roof, facade, or balcony without permission. Keep combustible smoker fuel and hot tools out of prohibited or unsafe areas.
9. Write the failure and relocation plan
Before bees arrive, answer:
- Who can care for the colony if the beekeeper is unavailable?
- Where can a defensive, queenless, sick, or oversized colony be moved legally?
- Who is the local swarm contact?
- How will a full hive leave the site without using an unsafe path?
- What happens during construction, pesticide application, wildfire smoke, flooding, or a neighbor emergency?
- Which inspector, extension specialist, veterinarian, or association can help with a health concern?
A site that has no safe exit plan is not ready for a hive.
Compare candidate locations
Score at least two possible sites rather than defending the first convenient corner. Photograph each location and revisit it at different times and weather conditions. Ask a local mentor to walk the route with you before equipment arrives.
| Candidate | Legal and permitted | Safe access | Flight path | Water | Weather and drainage | Neighbor impact | Relocation route |
|---|---|---|---|---|---|---|---|
| Site A | |||||||
| Site B | |||||||
| Community apiary |
If a community apiary scores better than the home site, choosing it is good beekeeping, not a compromise.
Final placement checklist
- The exact address, jurisdiction, registration, and property approvals are confirmed.
- The stand is stable, level, drained, and suitable for the structure beneath it.
- The full inspection area and equipment route stay clear in every season.
- The entrance and flyway avoid routine human and pet traffic.
- A dependable, maintainable water source is operating before bees arrive.
- Sun, reflected heat, shade, wind, storms, and winter access were evaluated locally.
- Neighbor concerns, security, swarm response, and emergency contacts are documented.
- Spare boxes and sticky equipment have protected storage.
- The colony can be removed safely if the site stops working.
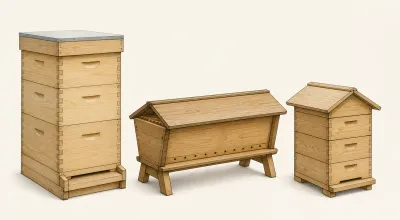
Once the location passes these checks, choose a compatible system with types of beehives for urban beekeeping and continue through the getting-started plan.