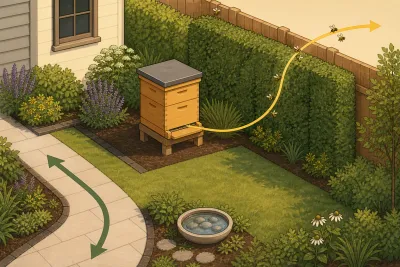
Types of Beehives for Urban Beekeeping
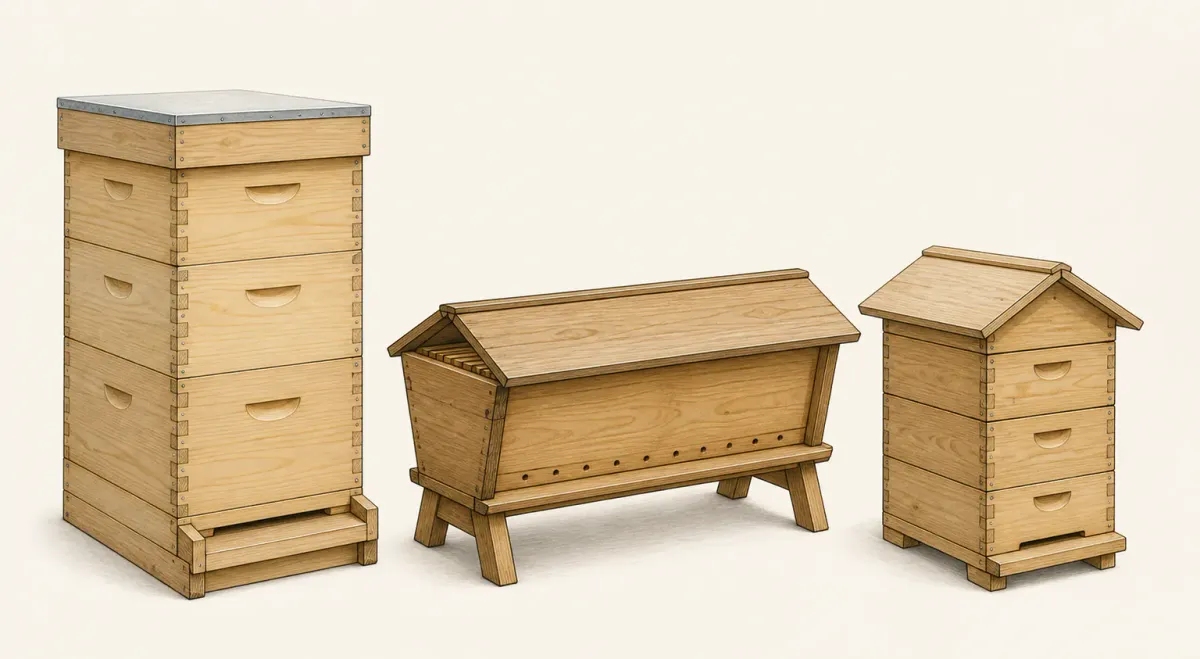
For most first-time U.S. urban beekeepers, a locally common Langstroth setup is the most supportable choice. Parts, drawn comb, nucs, extractors, classes, and mentor experience are easier to find. Another hive style can work, but the decision should be based on inspection needs, lifting, storage, local rules, and available training rather than a promise that one design is “natural” or maintenance-free.
All managed honey bee hives require inspections, pest and disease management, swarm planning, safe access, and legal placement. A different box shape does not remove those responsibilities. The comparison below is anchored by Utah State University Extension’s current hive-selection overview, which directly discusses Langstroth, top-bar, Warre, and Flow-style designs and their constraints.
Urban hive types compared
| Hive type | How it expands | Main urban strengths | Main urban constraints | Best fit |
|---|---|---|---|---|
| Langstroth, 8- or 10-frame | Boxes stack vertically; comb sits in removable frames | Widely available parts and instruction; compact footprint; frames support inspections and extraction | Full boxes can be heavy; spare boxes need storage; tall stacks need stable access and wind planning | Beginners who want local mentorship and compatible equipment |
| Horizontal Langstroth or long hive | Full frames extend sideways in one long body | Less lifting of full boxes; movable frames support inspections | Large footprint; fewer standardized bodies and covers; long reach and weatherproofing matter | Beekeepers with adequate ground-level space and lifting limitations |
| Kenyan or Tanzanian top-bar | Comb extends horizontally from removable top bars | No stacked supers; individual combs can be lighter to handle | Fragile unsupported comb; cross-comb risk; different inspection and harvest methods; large footprint | Beekeepers with a local top-bar mentor and space for the full length |
| Warre | Small boxes usually expand vertically; comb often hangs from top bars | Compact footprint and smaller boxes | Specialized management; comb access and legal removable-comb requirements need checking; fewer local mentors and parts | Experienced users with style-specific training |
| Flow-style honey super on a Langstroth hive | Conventional brood boxes with a proprietary harvest super | Can reduce handling during some honey harvest steps | Does not remove brood inspections, mite monitoring, swarm control, or lifting; proprietary parts and cost | Beekeepers who understand it as an accessory system, not an automated hive |
| Observation hive | Narrow glass-sided display enclosure | Education and short-term viewing | Heat, ventilation, escape, population, and inspection challenges; often regulated differently | Supervised educational use, not a default permanent balcony or home hive |
Traditional fixed-comb hives and skeps are poor choices for a managed urban apiary. Health inspection and disease control generally depend on comb that can be removed, and some jurisdictions explicitly require removable frames or combs.
Langstroth hives: the supportable default
A Langstroth hive uses removable frames in vertically stacked boxes. This format is common across U.S. classes, suppliers, apiaries, and inspection programs. That network effect matters more than novelty when a beginner needs a compatible replacement part during swarm season or an experienced person to inspect a sick colony.
Eight-frame vs. ten-frame
Eight- and ten-frame components are different widths and should be treated as separate systems. An eight-frame box is narrower and usually lighter at the same depth, while a ten-frame box holds more frames before another box is needed. Neither format makes a full honey box light.
Before committing, ask local suppliers and mentors which width they stock. Then choose one width and a limited set of box depths so frames, covers, feeders, and spare equipment remain compatible. A medium-box-only configuration can reduce the maximum weight of one box, but it uses more boxes and frames for the same volume.
Urban considerations
The vertical footprint suits small yards, but the stack needs enough working space for the beekeeper to stand beside it and place removed boxes safely. A tall hive on a roof or balcony can be hard to inspect and more exposed to wind. Do not plan to balance supers on a railing, narrow ledge, or shared walkway.
Horizontal Langstroth hives: less box lifting, more footprint
A long or horizontal hive holds full Langstroth-style frames in a single extended body. Management occurs by moving a cover and individual frames rather than lifting several full boxes to reach the brood nest.
This can help a beekeeper who can handle frames but not honey-filled supers. It does not make the hive universally accessible: the body can be deep, the reach can be long, and the entire unit is difficult to relocate. Covers must shed weather reliably across a larger area.
For a city site, measure the complete operating footprint, including the space needed to open covers, stand at the hive, remove frames, and carry equipment around both ends.
Top-bar hives: simple parts, specialized comb management
A horizontal top-bar hive allows bees to build comb down from removable bars rather than within four-sided frames. The beekeeper works through the hive one comb at a time.
Potential advantages include no stacked boxes and relatively light individual combs. The tradeoffs are significant: unsupported comb is more fragile in heat or when tilted, straight comb requires attentive early management, and most centrifugal extractors are designed for framed comb. Harvest commonly removes the comb, so the bees must rebuild it.
Choose this style only if a local mentor teaches top-bar management. Advice written for a Langstroth colony cannot always be transferred directly.
Warre hives: compact but not hands-off
A Warre hive is a vertical top-bar design made of smaller boxes. It is sometimes marketed as low-intervention, but urban colony stewardship still requires legally adequate inspection access, swarm management, disease response, and mite monitoring.
Ask the local apiary authority whether the intended bars and comb configuration meet removable-comb rules. Also confirm that a mentor can help without damaging comb, especially during hot weather.
Flow-style systems: harvesting is only one task
A Flow-style super uses proprietary comb channels intended to release ripe honey without removing each honey frame. The brood boxes below are still managed like a conventional hive.
The beekeeper must still open the colony to assess brood, queen status, food stores, pests, disease, temperament, and swarm preparation. Honey must be ripe before harvest, the system must be cleaned and maintained as directed, and bees may not fill the proprietary super on the beekeeper’s schedule.
Choose it for a specific harvesting preference, not because marketing implies the colony will manage itself. Our best beehive comparison examines commercially available starter systems separately from this educational hive-type guide.
Five questions that decide the right hive
1. What does your mentor use?
Hands-on help is most useful when the mentor knows the frame size, comb behavior, inspection sequence, and seasonal management of your equipment. Ask local associations what their beginner course and teaching apiary support.
2. Can you safely lift and reach every component?
Test the motion, not just an empty box. Consider full honey boxes, grip height, twisting, uneven ground, stairs, and where a removed component will rest. If lifting is a constraint, lighter box depths, fewer frames per box, team lifting, or a horizontal full-frame hive may help.
3. Where will spare equipment go?
Supers, frames, feeders, covers, stands, and harvest equipment must remain dry and protected from pests. A compact hive can still create a large storage burden. Exposed used comb can attract robbing bees and spread disease.
4. Does the local rule require removable frames or comb?
Some apiary laws specify movable frames or removable combs so inspectors can examine a colony. Confirm the exact hive configuration with the authority, not just the product name. Use the address-based law lookup before purchasing a colony.
5. Will the hive fit the site while open?
Measure for the beekeeper, boxes, tools, an escape path, and a second person helping during an inspection. Then evaluate entrance direction, water, drainage, sun, wind, security, and neighbors in the urban beehive placement guide. If the proposed site is a balcony, complete the separate balcony suitability assessment before purchasing equipment.
Common buying mistakes
- Mixing eight- and ten-frame Langstroth widths.
- Buying a nuc whose frames do not fit the chosen hive.
- Assuming components from every manufacturer are perfectly interchangeable.
- Choosing deep boxes without planning for their filled weight.
- Buying used comb without a traceable disease history.
- Selecting an uncommon design without local instruction or replacement parts.
- Treating a harvest feature as a substitute for colony inspections.
- Ordering bees before laws, permission, placement, and water are settled.
A practical beginner recommendation
If local teachers and suppliers use Langstroth equipment, start with the width and box depths they can support. Standardize your parts, label spare equipment, and take an in-person class before bees arrive. If accessibility makes a standard stack unsuitable, discuss medium boxes or a horizontal full-frame design with an experienced mentor and, where needed, an occupational or accessibility professional.
Continue with getting started in urban beekeeping, the first-year beginner calendar, and the essential beekeeping tools guide after the hive and site decisions are aligned.